48 Creative Pumpkin Carving and Decoration Ideas for Halloween
Pumpkin decorations are the hallmark of Halloween, bringing an air of festivity with their spooky and creative carvings. These seasonal adornments transform homes and front yards into eerie landscapes.
The variety of shapes and sizes of pumpkins allows for endless artistic expression. Dive into carving and decorating to set the perfect Halloween scene.
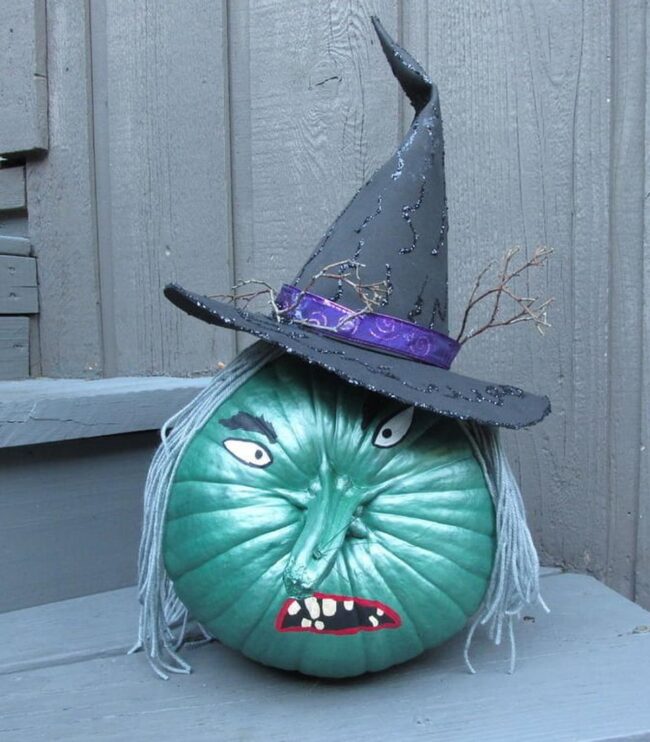
Neon Witch in Waiting
A witch appears right on the stem of a pumpkin, proving that she can be even uglier than expected. Her long nose and misplaced eyes create a frightening image.
Missing teeth add to her scary look, while shiny acrylic paint gives her an unpleasant glow that highlights every dreadful feature. This spooky creation comes together with a couple of coats of paint, a classic pointed black hat, messy yarn for hair, and twisted facial cutouts glued securely in place.
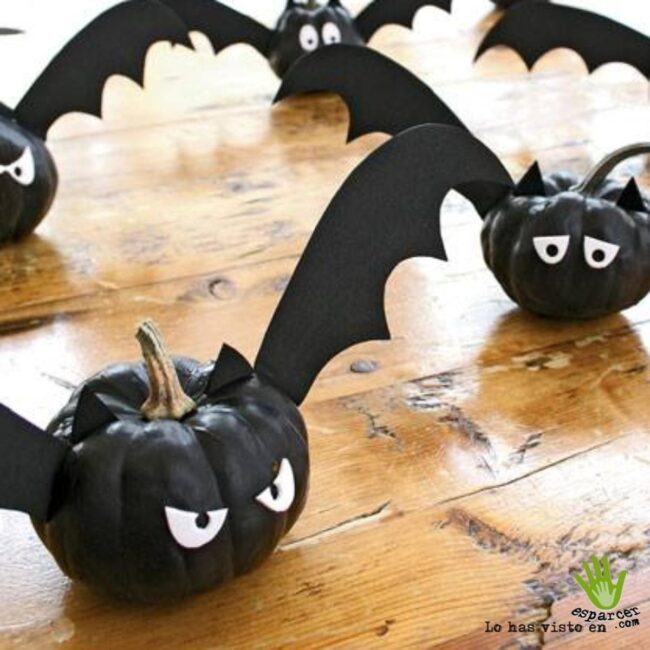
Bat Tin a Thousand
Bats may look spooky, but they can be fierce. Halloween brings out their wild side as they swoop down to surprise trick-or-treaters.
Mini pumpkins work well for creating these bat decorations. Black paint gives the pumpkins a creepy vibe, representing the body of each bat.
For wings and ears, use vinyl cutouts or black tag board; drawing your own adds a personal touch too! After cutting them out, hot glue them onto the pumpkins and finish with eyes colored in using a magic marker.
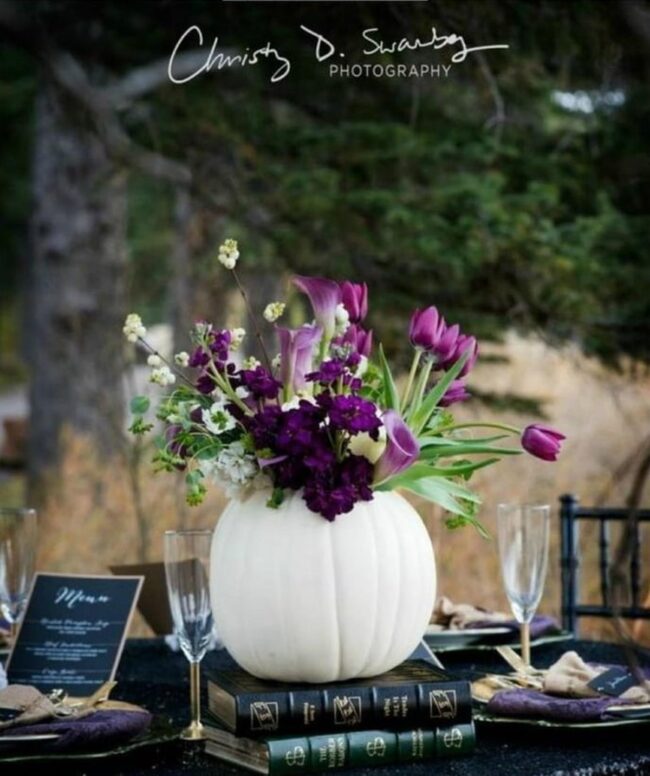
Pumpkin Bouquet
A lovely bouquet brings a soothing touch to any Halloween gathering. It stands out beautifully against the typical playful decorations of the season.
A white pumpkin serves as an excellent base for this charming display. Cutting off the top and clearing out seeds creates space for a glass vase inside.
Flowers in shades of lilac and purple add vibrant color, making it even more appealing at your buffet or entryway.
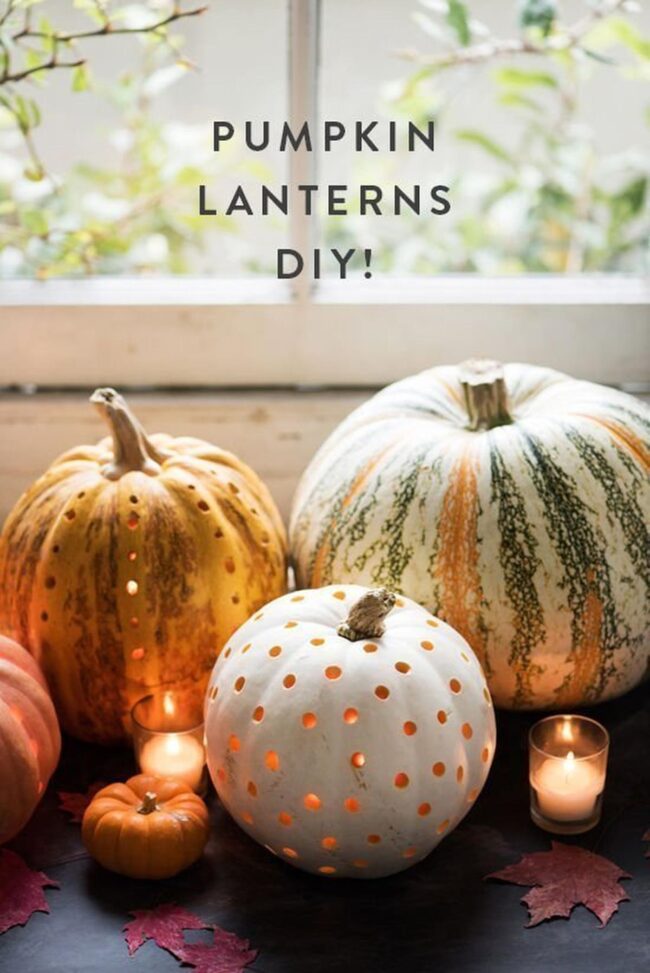
Punch a Hole Pumpkin
Lantern-like pumpkins create a warm glow that brightens both indoor and outdoor spaces for Halloween. These pumpkins add charm to your entryway, whether it's on a porch or a foyer table.
Guests will feel welcomed as they see the inviting light shining through. A simple project involves cutting off the bottom of the pumpkin and cleaning out its insides before drilling holes for light to shine through.
Wire and Sequin my Web
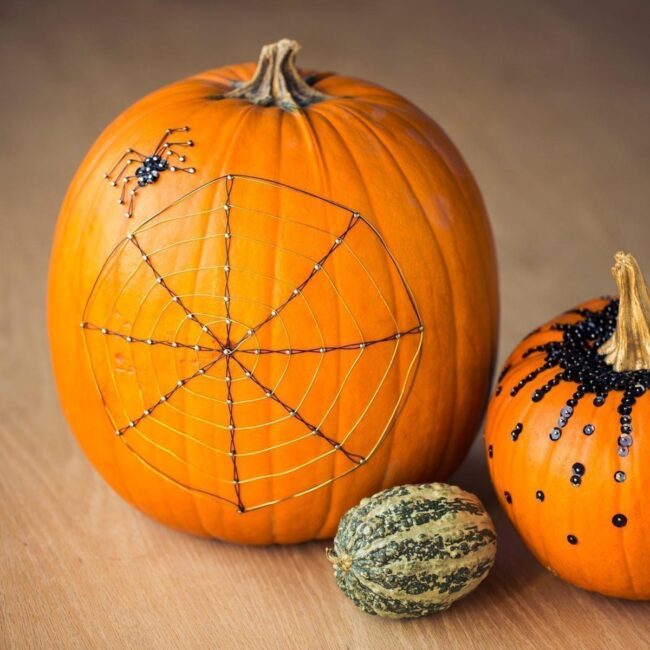
Decorating pumpkins for Halloween can be simple and fun. Wire and sequins work well together to create spooky spider webs.
Start by picking a pumpkin, then mark the center with a dot. From that point, draw six small dots radiating outward.
Secure these spots using tiny brads, and weave wire in a crisscross pattern to form the web shape. Add black wire around the outside edge of your design for extra flair.
Finally, use sequins along with wire pieces to make the spider's body and legs come alive on your pumpkin.
Bat Crazy Cat
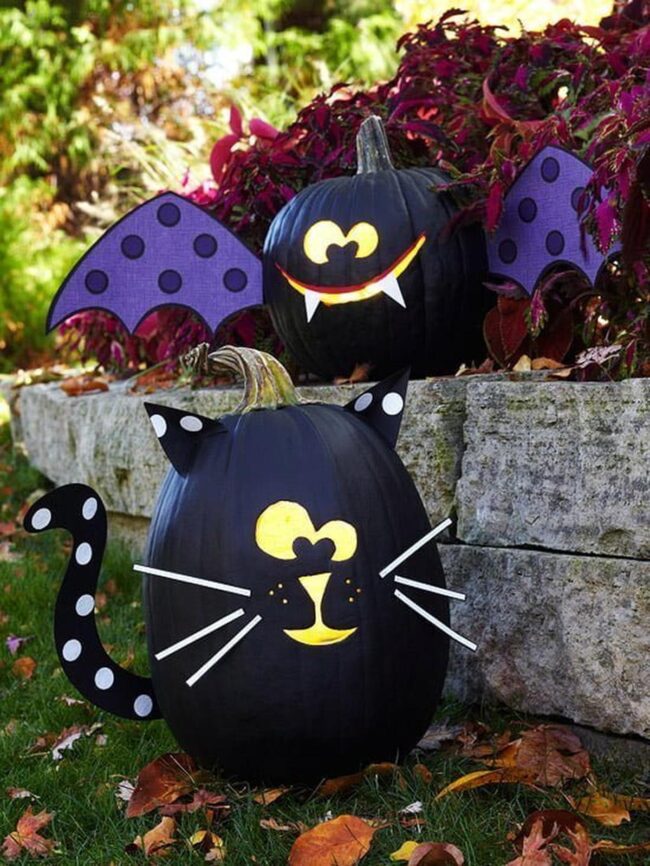
Decorating pumpkins with bat and cat designs brings excitement to Halloween. Kids can easily paint two pumpkins using flat black paint.
Crafting patterns is simple; you can create your own or download free templates online. Card stock or heavy craft paper in fun colors works well for making animal features and accents.
This project allows creativity to shine, making it perfect for both children and adults who love crafting.
Ghostly Welcome
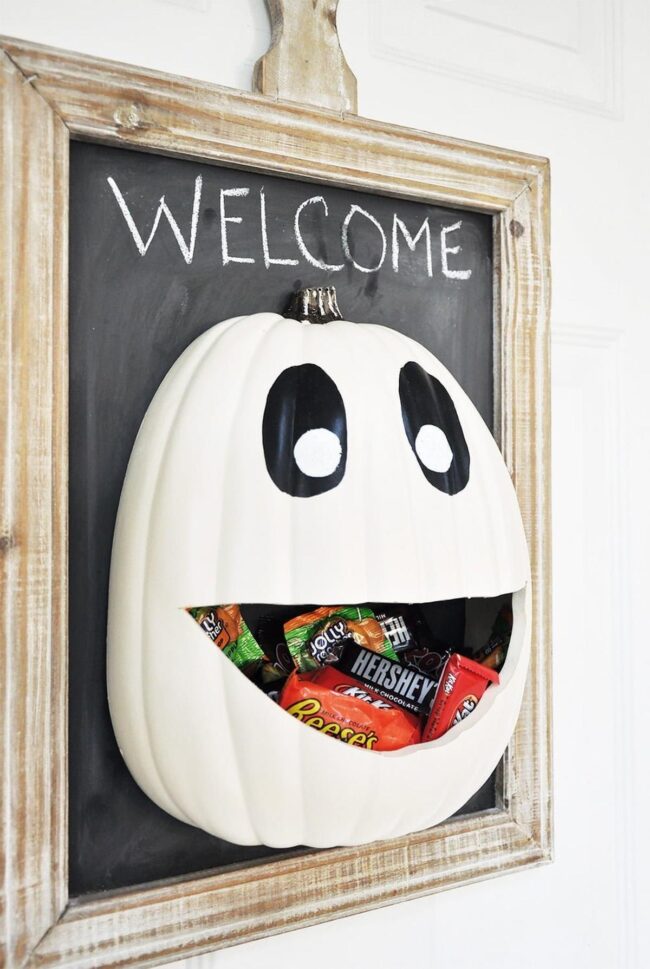
Halloween brings fun and excitement, especially when it comes to decorations. A cheerful half pumpkin with a friendly face acts as a door hanger for candy.
Guests can grab treats easily while reading your welcoming message. This simple decoration allows you to share sweets even if you're not home on Halloween night.
Craft stores stock all the supplies needed for this project, including tools for cutting out the bottom half of the pumpkin and painting its eyes black and white. Screws hold everything together securely on a chalkboard base, making it easy for kids to enjoy their candy treat before heading off to their next adventure.
Toothy Dracs and Winged Friend
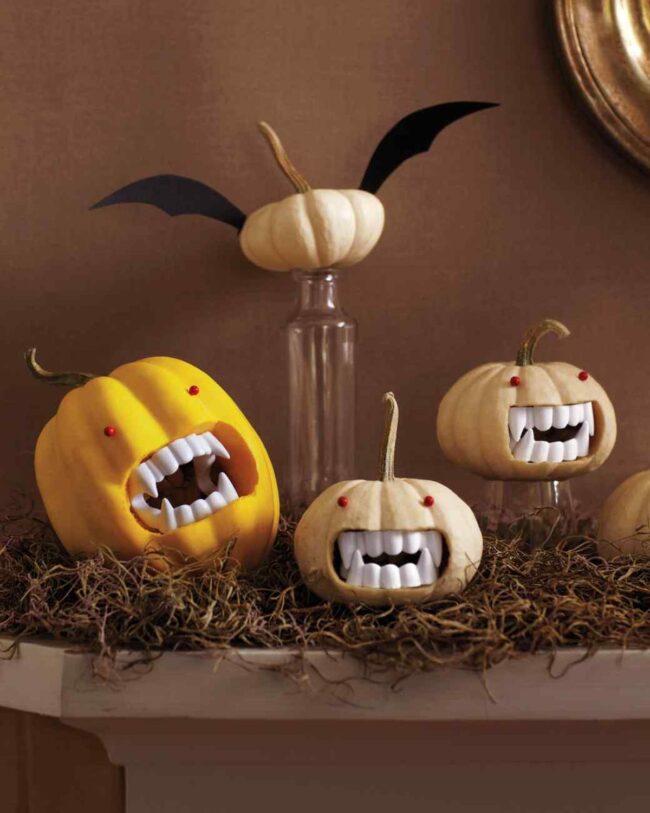
Use small white pumpkins to create a spooky display. Trace a mouth template onto each pumpkin, using a thumbtack for precision.
The size of the pumpkins makes the vampire teeth look bigger and scarier. After cutting out the mouths with a small saw blade, insert plastic vampire teeth and push in evil red eyes made from pushpins.
For an added twist, make bat wings by tracing your design on construction paper and cutting it out. Attach these wings to one pumpkin with hot glue for extra flair on your foyer table or mantel!
Salt Laden Pumpkin
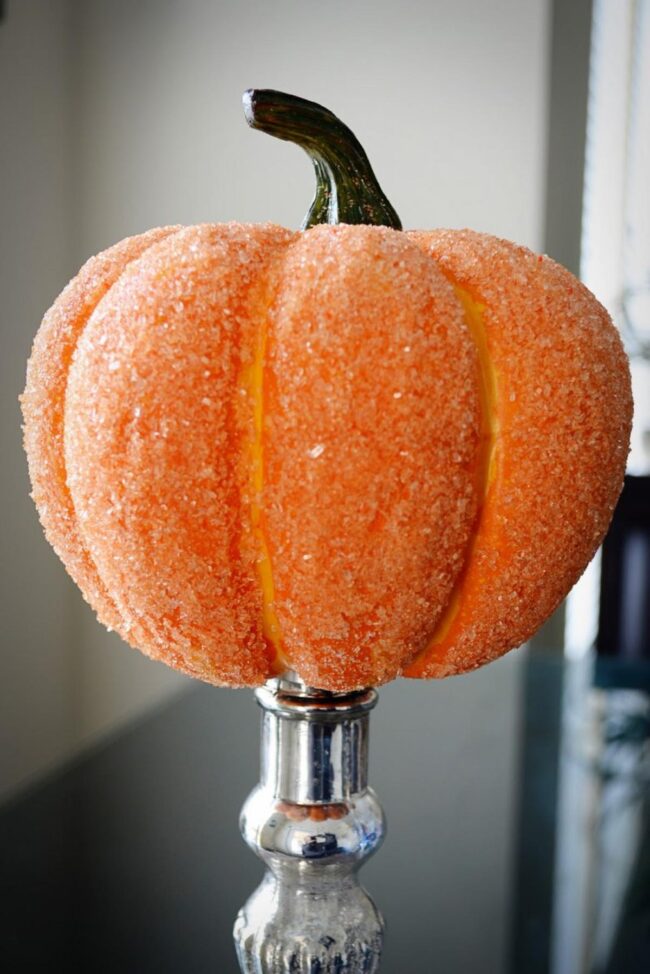
A stunning display can be created with a simple pumpkin and a few household items. Use any Halloween pumpkin for this project, adding white glue to each section of the fruit.
Sprinkle salt crystals over the glued areas for an eye-catching effect. A smaller pumpkin looks great on a silver candlestick, while a larger one shines beautifully on an ornamental cake stand or tray.
Allow everything to dry completely before showcasing your unique decoration at home. This Russian house ornament design adds charm and creativity to your Halloween festivities.
Kitties in a Gourd
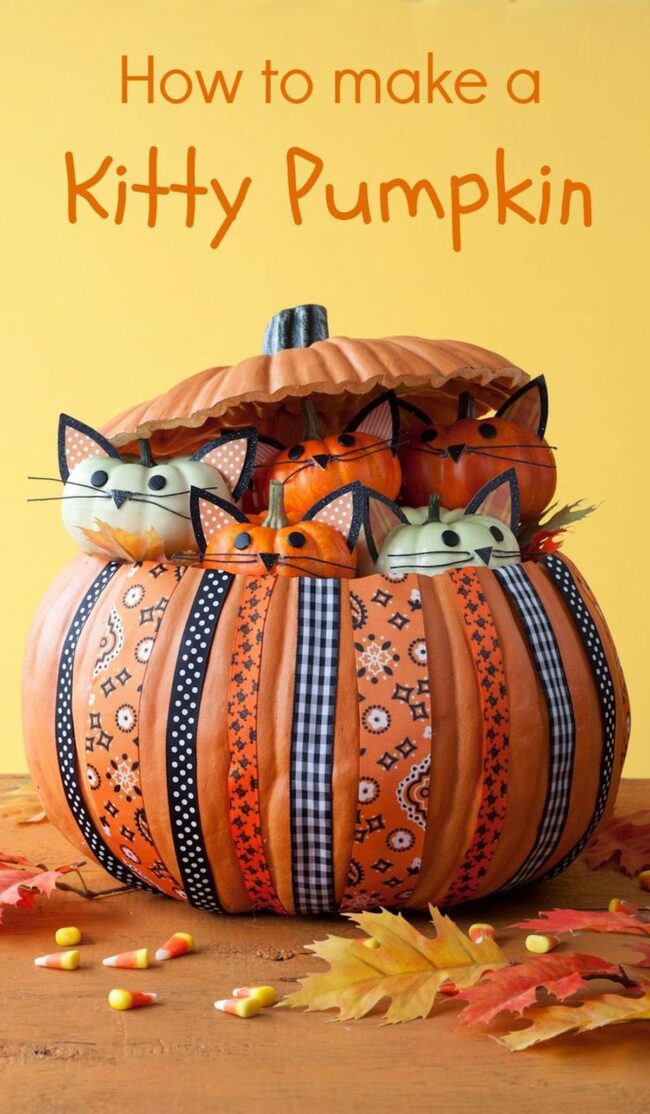
A larger pumpkin filled with smaller pumpkins creates a warm and fun Halloween display. Cat lovers will appreciate this charming design featuring kittens nestled within a hollow pumpkin.
Begin by finding a medium-sized pumpkin at your local craft store, along with three to five smaller ones. Cut off the top of the large pumpkin to create space for the little ones.
Fill that area with colorful fall leaves, making it an inviting spot for those adorable "kitten" pumpkins. Add black foam ears and cord whiskers to each small pumpkin, then draw eyes and noses using a black marker before placing them in their leafy bed on skewers or dowels.
All Dressed Up in Tulle
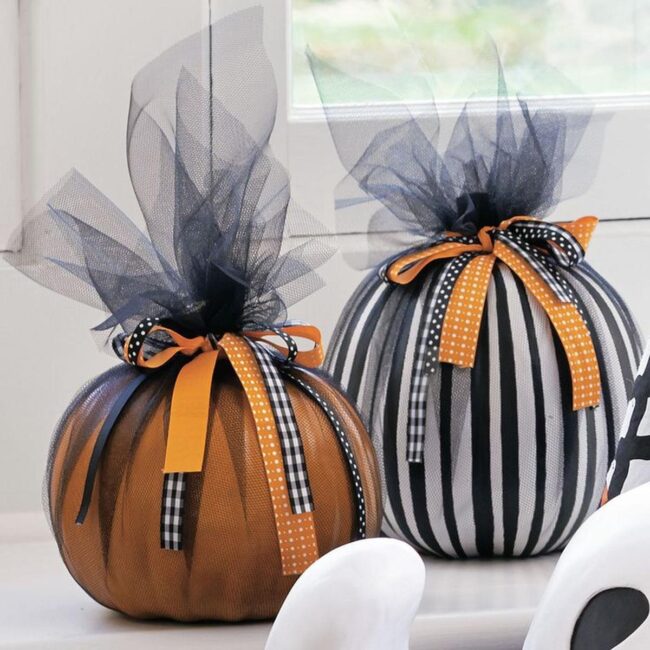
A beautiful pumpkin decoration can come to life with just a few simple items. Tulle adds a soft touch, while Halloween-colored ribbons bring in festive flair.
Wrapping these around the stem of your pumpkin creates an eye-catching look in no time at all. Real pumpkins work well, but foam ones offer durability for long-lasting enjoyment.
Finding tulle and patterned ribbons is easy at craft stores; they provide extra texture and color that enhance any display. Purchase enough tulle to ensure it drapes nicely beyond the stem for added height after tying on the ribbon.
Trick or Treat Ombre Twist
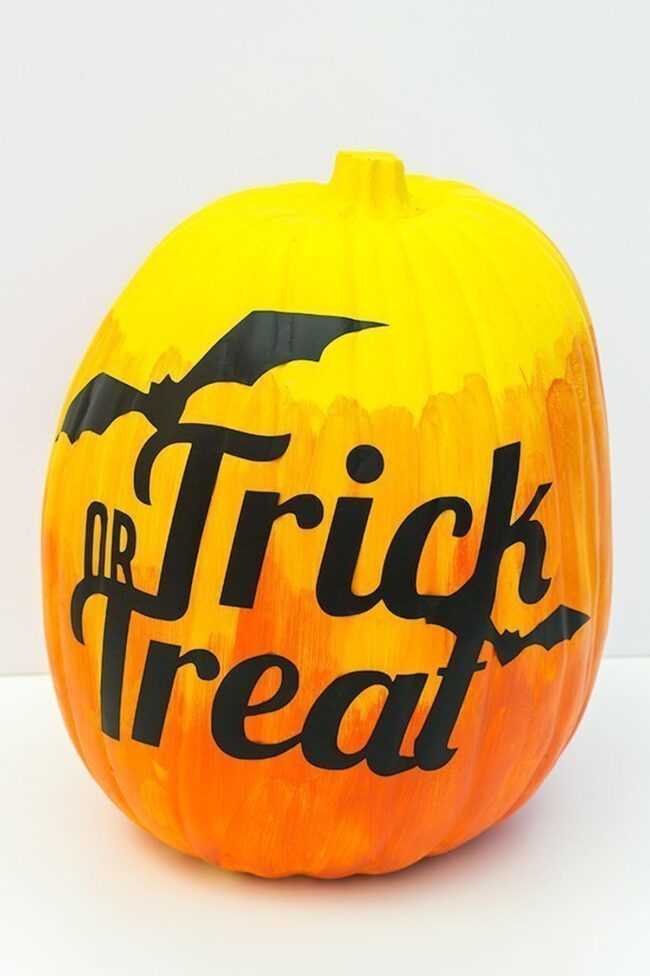
This pumpkin decoration stands out with its bold "Trick or Treat" lettering, capturing the spirit of Halloween. Start with a white faux pumpkin and choose three shades of craft paint that are similar in color.
Apply the lightest shade at the top first. While it's still wet, add the medium shade to the middle part of your pumpkin.
Use the darkest color for the bottom section to complete your ombre effect by blending each painted area carefully. After everything dries, cut out or peel off ready-made letters and place them on your festive creation for a fun touch!
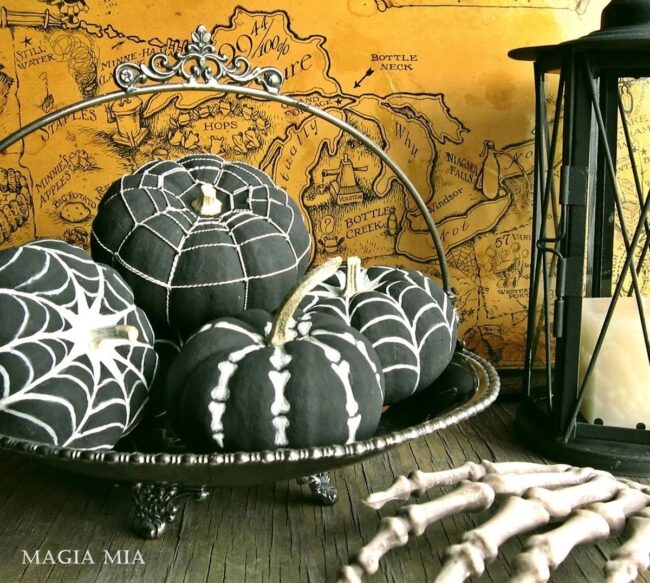
Black Magic Minis
Crafting with mini pumpkins is a fun and simple activity. Black paint adds depth to a white pumpkin, highlighting its unique features.
For an eye-catching effect, glow-in-the-dark paint can create spooky designs like spider webs or skeletons. Adding silver elastic cording gives the pumpkin a shiny look that mimics the delicate threads of a spider web.
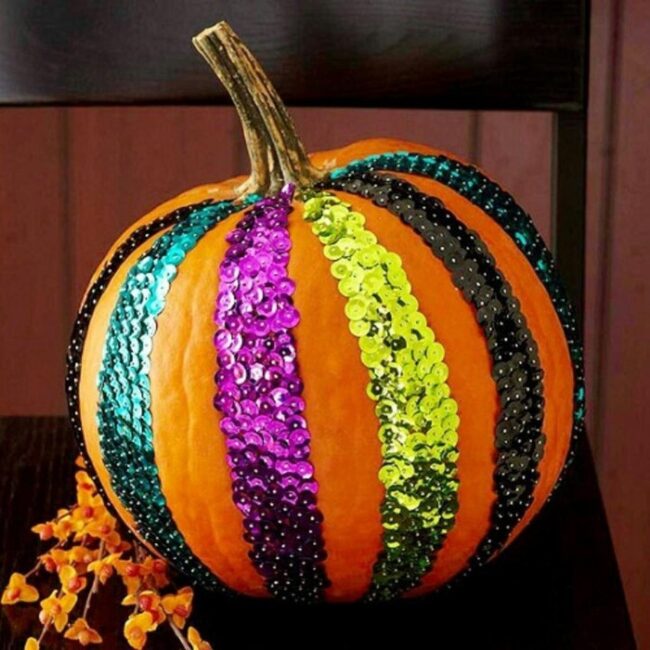
Ribs of Sequins
Glamour shines through sequins, adding sparkle to any pumpkin. Simple placement along the ribs makes your decoration unique and eye-catching.
Choose colors that match your style, mixing bright carnival shades or classic Halloween tones for fun designs. Use pins or craft glue to attach each band of sequins securely on the pumpkin's surface.
Overlapping helps create a thick band, ensuring it stands out even more. Your creativity will make this project truly special!
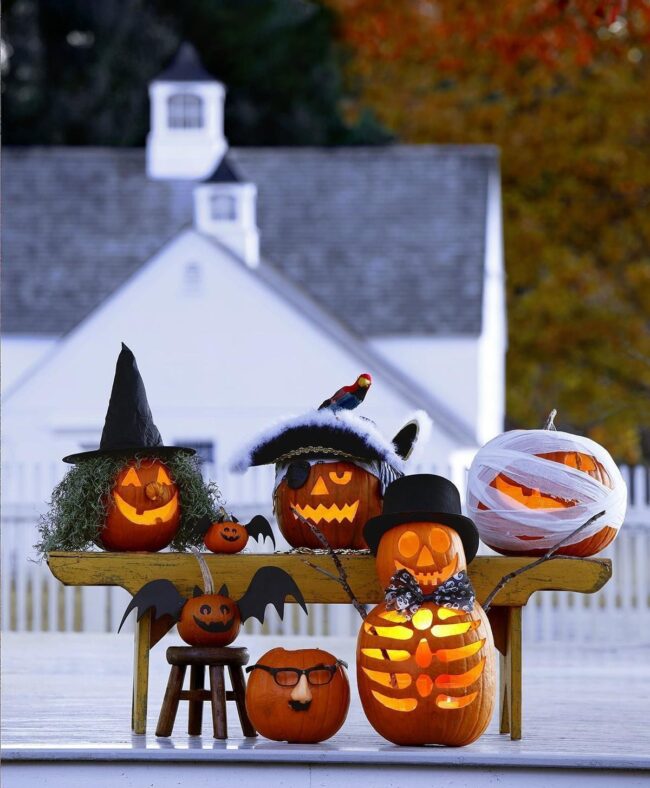
Halloween Medley
Ready to make a splash at any Halloween event, this lively group brings charm and excitement. A snowman, pumpkin person, pirate, bat, witch, and mummy invite everyone to join the fun.
This collection adds unique height and playful touches to your mantle or party table. Gather pumpkins of different sizes—real or fake—and mix in costume pieces for extra flair.
Carving faces on some pumpkins can bring them to life while choosing features for others adds variety. With creativity at hand, you’ll have a memorable Halloween display that stands out!
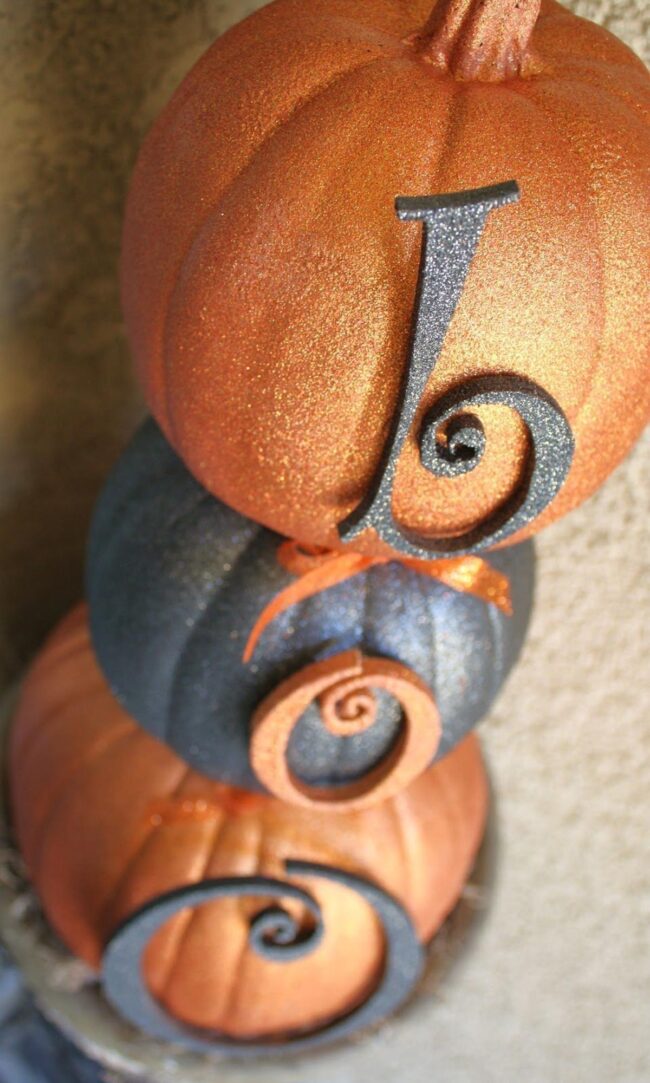
Stacks of Glittern BOO
Pumpkins bring a festive spirit to any entryway. Start by gathering three foam pumpkins and remove the stems from two of them.
Spray paint all pumpkins in fun Halloween colors, adding some sparkle with glitter paint for an extra touch. Wooden letters B, O, and O should also receive a coat of paint to match the pumpkins.
Once everything dries, stack the pumpkins with the one that still has its stem on top and secure them using hot glue. A ribbon in iridescent orange can hide any messy spots between layers while boosting visual appeal as well!
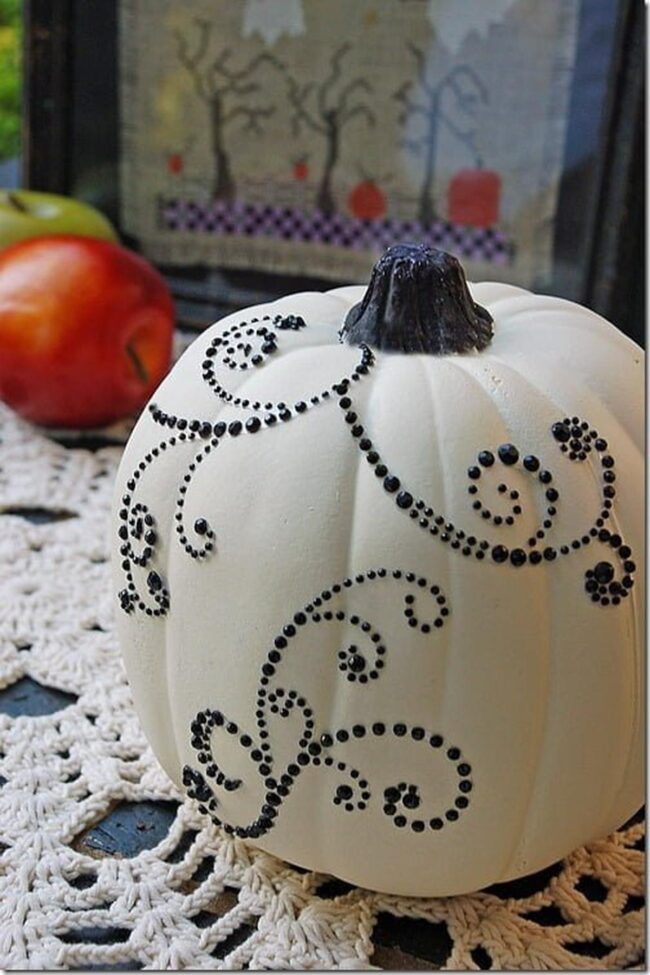
Beaded Bling Swirl
Transforming a plain white pumpkin into something special is quick and easy. With just a few black jewel stickers, that simple pumpkin jumps from the back of the closet to your front foyer.
Stick those jewels on in any pattern you fancy, and it looks elegant. Many other designs are available too, offering more ways to add flair to your pumpkins.
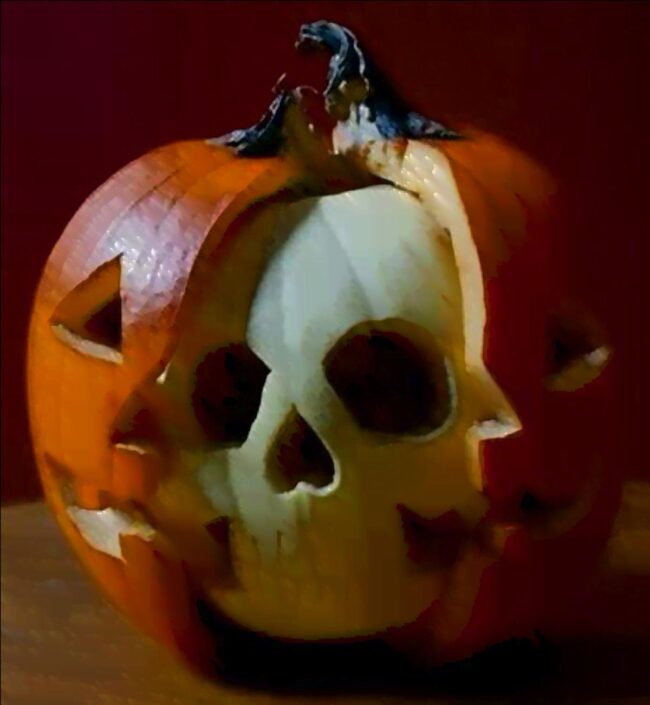
Dual Personality Inner Face Outer Face
A spooky Halloween decoration features a clever pairing of pumpkins. An outer orange pumpkin opens up to reveal a white inner pumpkin shaped like a scary skull.
This creation shows off two faces, one cheerful and the other menacing, with hollow eyes and sharp teeth. Crafting this decoration is simple; use a craft knife to carve both pumpkins easily.
Attaching them requires just some crafting or hot glue for support. Scaring friends and family has never been so fun!
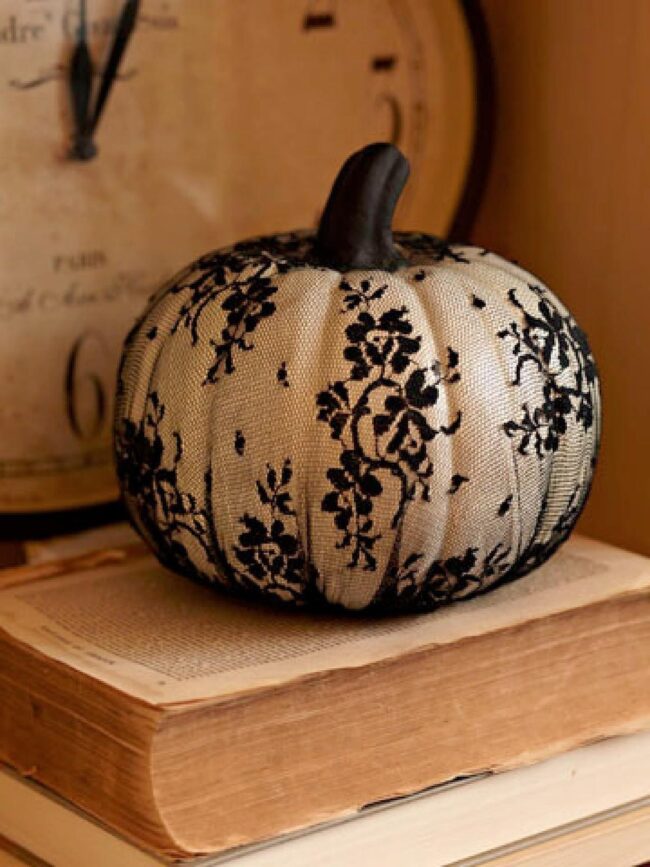
Wrapped in Lace
Transforming pumpkins into something special is easy with embroidered lace fabric. Start by choosing a piece of lace that matches the pumpkin's color, whether it’s white, orange, or painted.
Enough fabric should be purchased to cover a medium to large pumpkin completely. Gather the lace at the bottom and mark where you need an opening for the stem.
Cut out a circle for this area and lay the fabric over it carefully. After gathering again at the base, trim any extra material and secure everything in place using stitching or fabric glue.
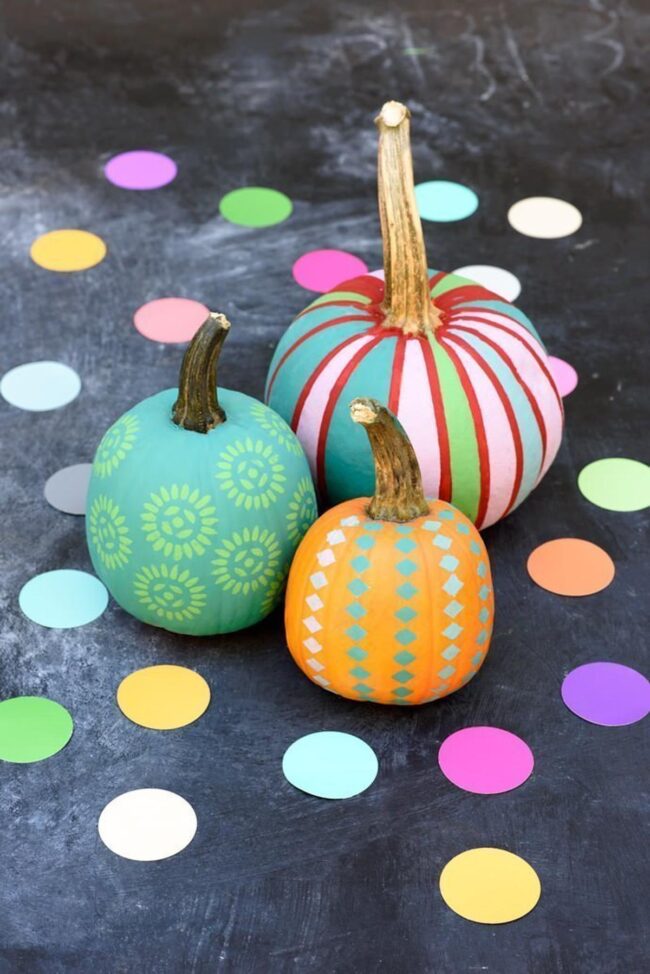
Abundant Color Minis
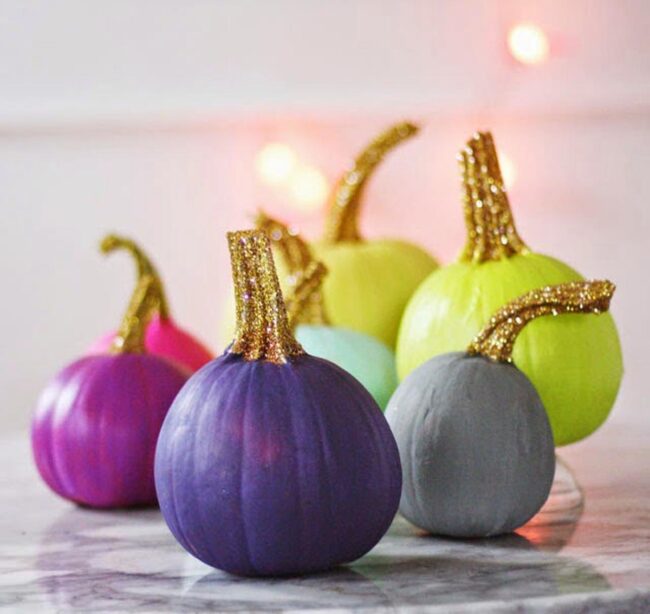
Mini pumpkins shine as fun gifts for Halloween. Their small size makes them easy to paint, allowing you to add bright colors and creative patterns that catch the eye.
Using chalk paint works well since it sticks easily without needing any prep or priming. You can apply stencils or use various brushes for freehand designs, giving each pumpkin a unique touch.
After the initial layer dries, adding extra details becomes simple and enjoyable. These painted pumpkins bring a playful spirit that everyone will love.
Lollipop Monster Pumpkins
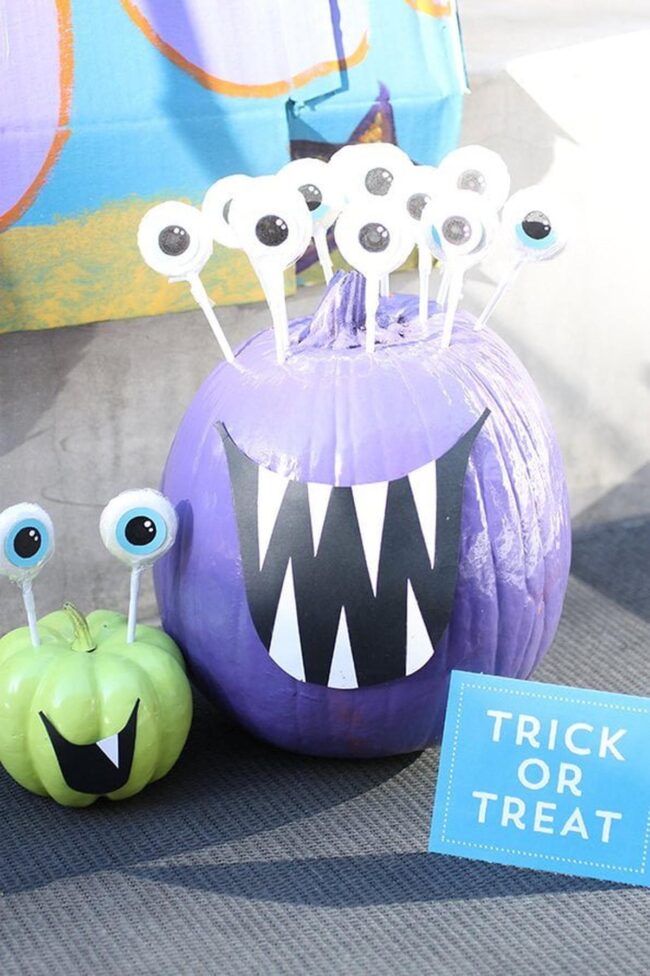
A fun Halloween party needs eye-catching decorations. Bright, neon-colored pumpkins grab attention effortlessly.
Lollipops serve as simple eyes, while fang-like teeth add a hint of fright mixed with playfulness. Creating these spooky yet friendly pumpkins requires only a few items: colored construction paper, paint pens, neon spray paint, a wood skewer for lollipop holes, and enough white lollipops to complete each pumpkin's look.
Thumbtack My Pumpkin
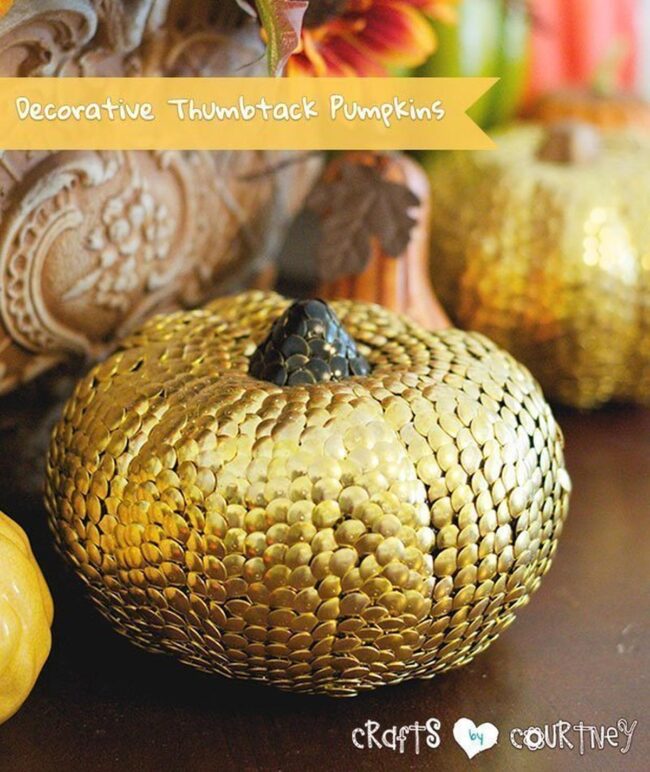
Decorating pumpkins with thumbtacks adds a unique touch to your fall theme. Gold and darker colored thumbtacks work well for different parts of the pumpkin.
Craft and dollar stores usually carry both items, along with styrofoam pumpkins. Choose at least three boxes of thumbtacks since an average-sized pumpkin needs about two and a half boxes for full coverage.
Start by placing tacks in a circle around the stem area, then continue downwards until reaching the bottom.
Crayon Melt and Drip
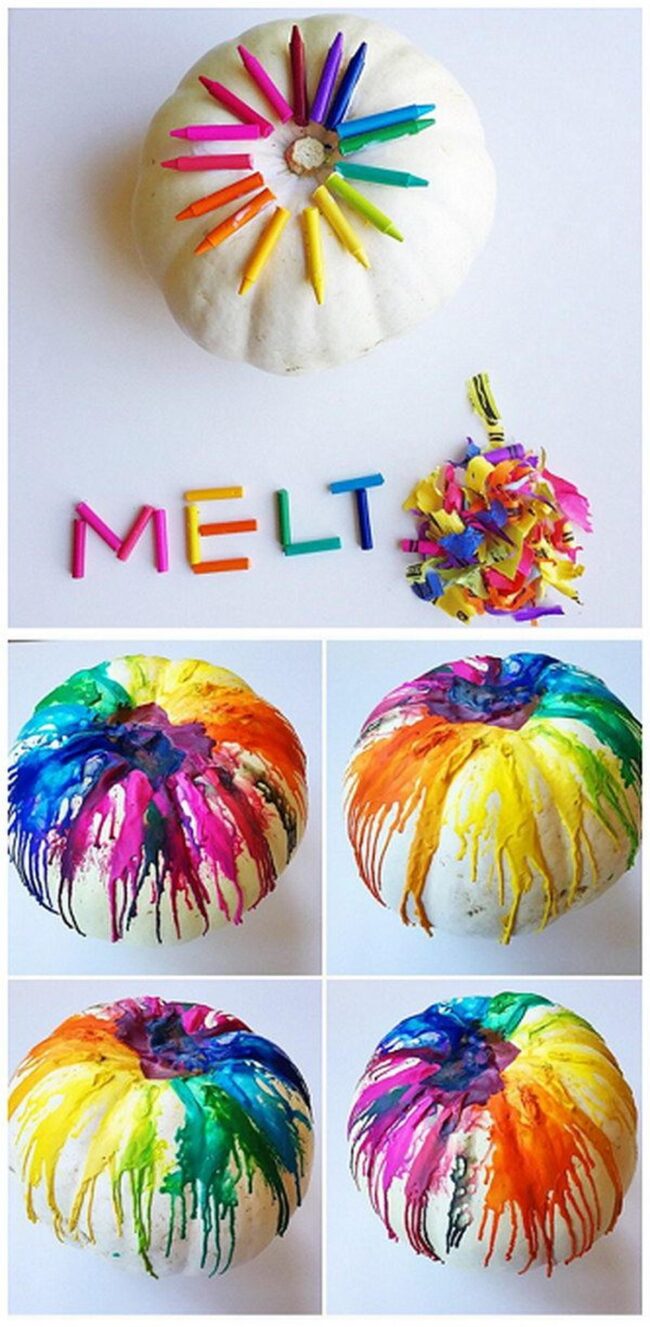
A colorful Halloween pumpkin awaits with just a few easy steps. Start by choosing around eight crayon colors that catch your eye.
Wrappers need to come off, and then cut the crayons in half for easier use. Tacky glue will help you stick the crayon pieces on top of the pumpkin securely.
Once everything is in place and dry, grab a hair dryer to melt those crayons. Direct heat where you want it to go for beautiful drips down your pumpkin’s surface.
Polka Dot Bouquet
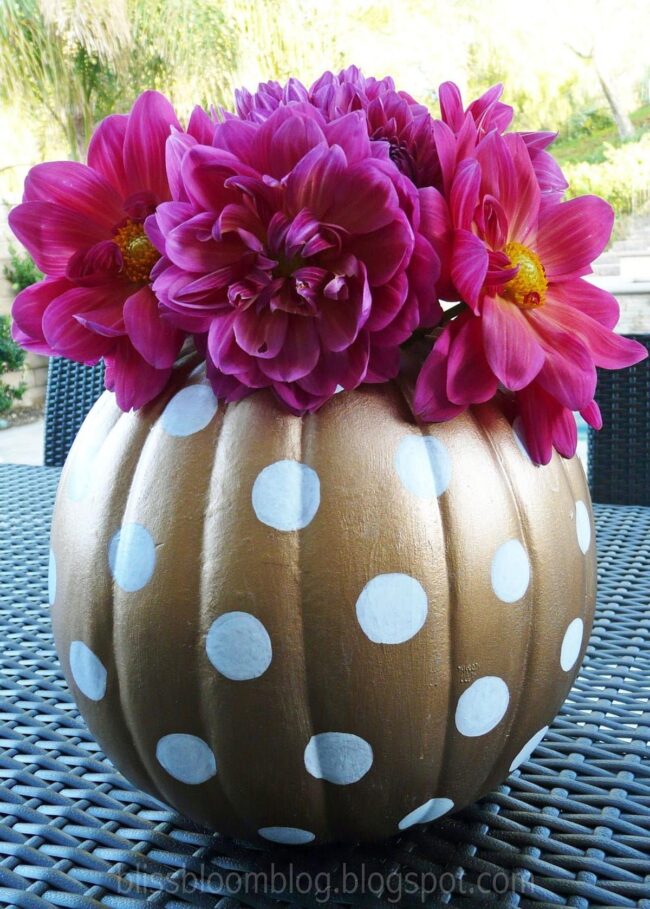
Brighten up your Halloween decorations with a polka dot pumpkin vase. This charming piece serves as a centerpiece for parties or adds flair to shelves and tables throughout your home.
Start by taking a white faux craft pumpkin, removing its stem, and making an opening on top. Gold acrylic paint creates a shiny finish after several coats dry completely.
A white paint pen easily adds fun polka dots; just let each layer dry before applying more until you achieve the desired look. For fresh flowers, consider using a vase insert inside the pumpkin for added convenience.
Petals and Vines
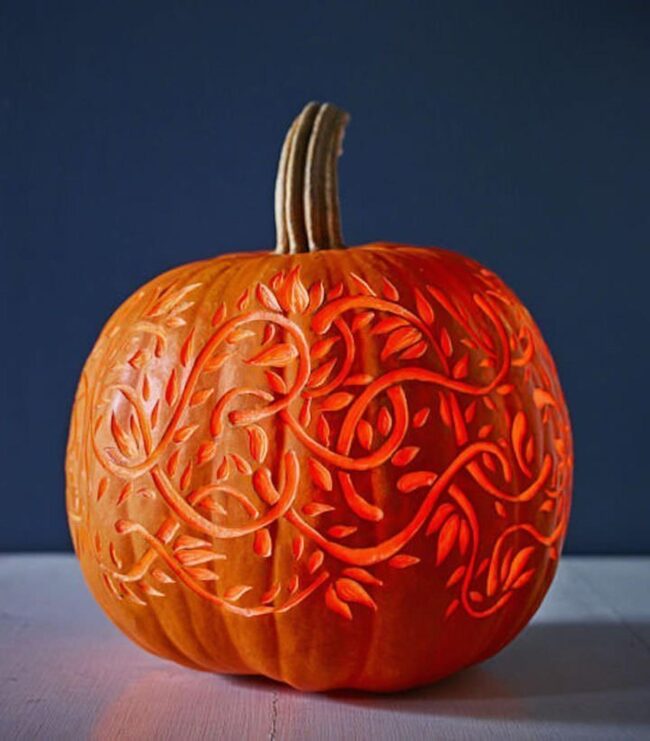
Memories of crisp autumn days come alive with images of falling leaves and swirling petals. The design features beautiful vines that seem to dance in the wind, adding charm to any decoration.
Carving only the top layer allows for glowing three-dimensional effects without cutting through completely. Use stencils or draw directly on your pumpkin for easy transfer of patterns.
Kitchen tools like lemon zesters or linoleum cutters work well for carefully removing layers from your pumpkin’s surface, making this a delightful project you can enjoy every Halloween.
Electrically Charged Buggies
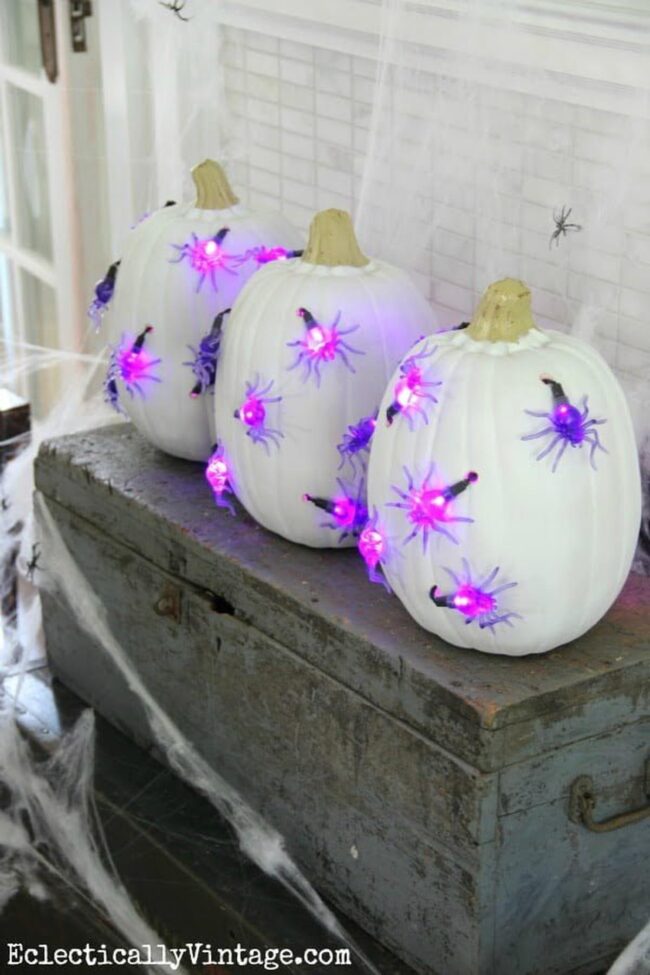
Spiders and other creepy crawlies bring a fun touch to your pumpkin decorations. Creating a spooky trio starts with white spray paint on foam pumpkins.
After that, drill holes for the light tips, then cut an opening in the back for the string of lights. The next step involves removing spiders from their light strings before inserting them through those drilled holes.
Once everything is in place, reattach the spiders and secure them with double-sided tape so they sit flat on each pumpkin. Plug it all into an outlet to see those little creatures glow brightly in their new homes!
Crown Jewels
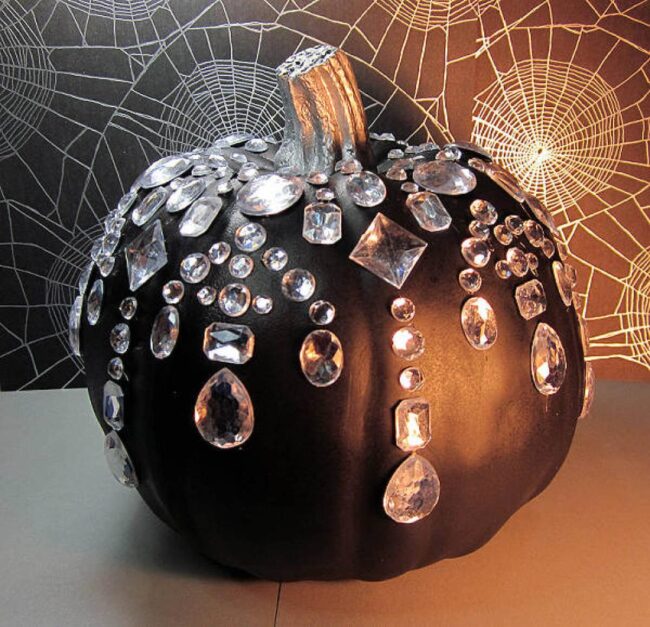
This pumpkin decoration shines with its sparkling jewels, adding a touch of glamour. A faux pumpkin works well for this project as it lasts longer than a real one.
Deep metallic paint in jewel tones makes the design pop, while another color on the stem adds contrast. Several coats may be necessary to create a rich look.
Once dry, it's time to apply those dazzling jewels for an elegant finish; adhesive-backed gems or hot glue can secure them perfectly.
Eye Candy Sweet Skull
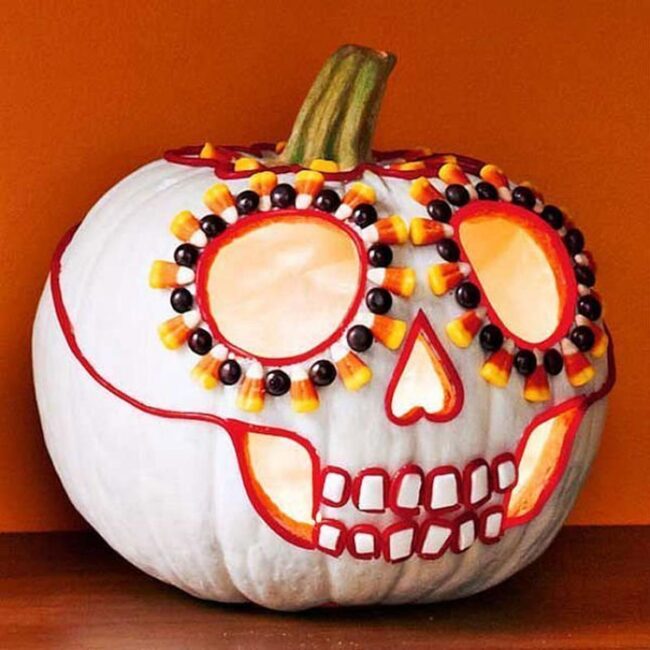
Recognizing loved ones who have passed away brings a special meaning to Dia de los Muertos, also known as the Day of the Dead. Sugar skulls play an important role in this celebration, adding a colorful touch.
A simple way to join in is by transforming a white pumpkin into your own sugar skull. Carving eyes and shaping cheeks is straightforward for anyone willing to try it out.
After cleaning out the insides, craft glue holds candy pieces like corn candy around the eyes and red licorice outlines them beautifully. White gum squares fit perfectly for creating shiny teeth that finish off this festive decoration nicely.
Caterpillar Pumpkin Stretch
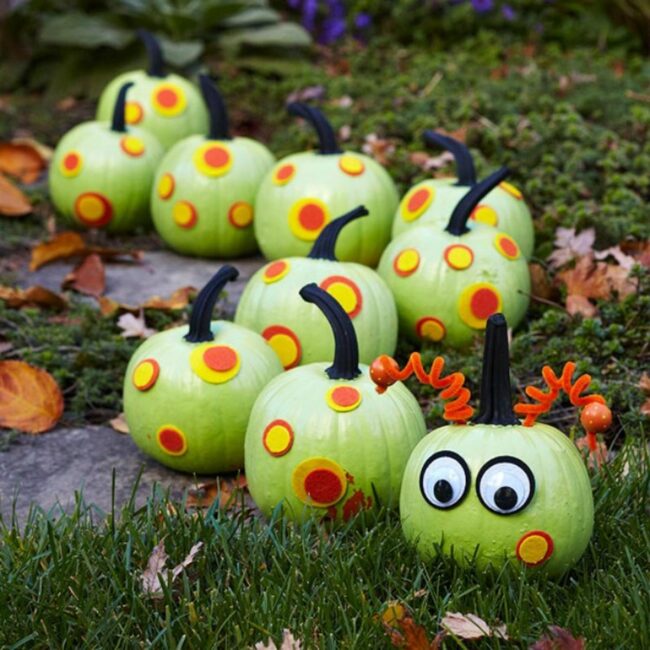
Pumpkins can turn into adorable caterpillars, especially when you choose the right sizes. Children enjoy making this simple insect pumpkin craft.
Small pumpkins painted bright green create a fun body, while colorful felt circles add decorative flair. Googly eyes give personality to the front pumpkin, and pipe cleaners make great antennae on top.
A squiggly or S-shaped arrangement looks delightful in your yard or on a porch.
Glitzy Bling Pumpkin
Using shiny beads like iridescent, metallic, or crystal ones gives it a glamorous touch. A few simple steps can change an ordinary pumpkin into a stunning piece of decor.
Start by applying craft glue where the beads will go and then wrap them around in circles. Continue this until you reach the top near the stem.
Pumpkin Tree Entry Topiary
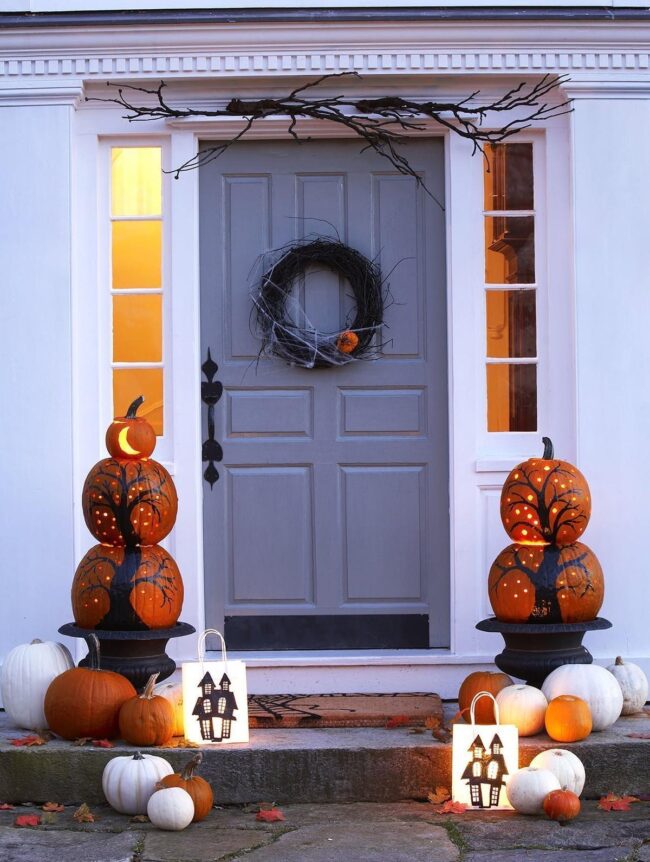
Lighting up the path for trick-or-treaters creates a welcoming atmosphere on Halloween. Placing pumpkin tree topiaries in planters brings balance to your entryway, making it look complete.
This project is simple and fun, requiring just some sketches or paint to create a gnarled tree design on two large pumpkins. Flat surfaces are easily achieved by removing the stems from the pumpkins where they connect.
Drilling holes allows beams of light to shine through, mimicking stars in the night sky. Topping off with a mini pumpkin featuring a glowing moon adds an enchanting touch that captures attention.
Pumpkin Lady
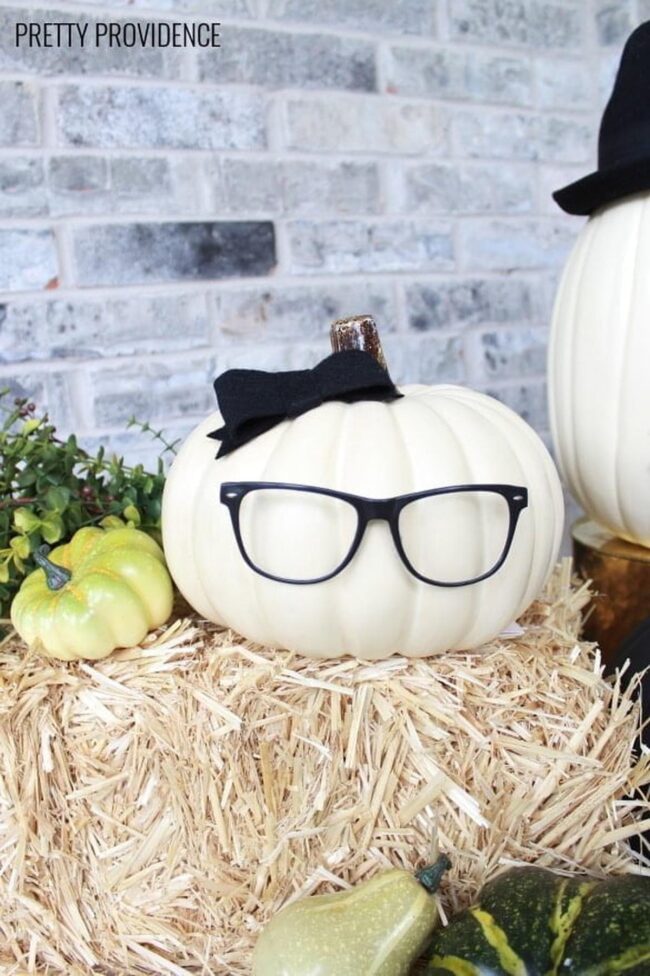
A no-carve pumpkin display allows you to represent family, friends, and colleagues using simple white or cream pumpkins adorned with unique accessories. A black-and-white theme stands out and simplifies the decoration process for any gathering.
Gather craft pumpkins along with black felt, scissors, glue, and various accessories like hats or glasses. Use the felt to cut out mustaches, eyes, noses, bows, and other features that give each pumpkin its personality.
Hot glue these pieces onto your pumpkins for an easy yet creative touch that celebrates everyone in your life!
Crazy Pumpkin Plant Trio
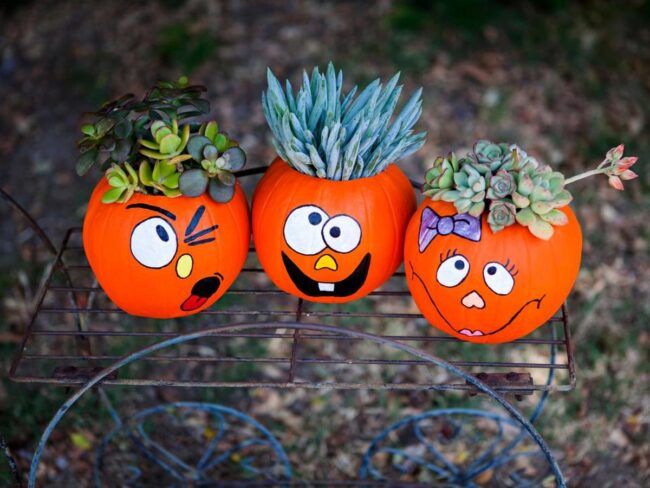
Three small pumpkins make fun plant holders that can brighten up any space. Start by removing the stems and tops of each pumpkin.
Clean out the insides, then poke small holes in the bottom for drainage to keep roots healthy. Use craft paint to add silly or spooky faces on your pumpkins, giving them unique personalities.
Fill each hollowed-out pumpkin with soil and place your favorite succulents inside.
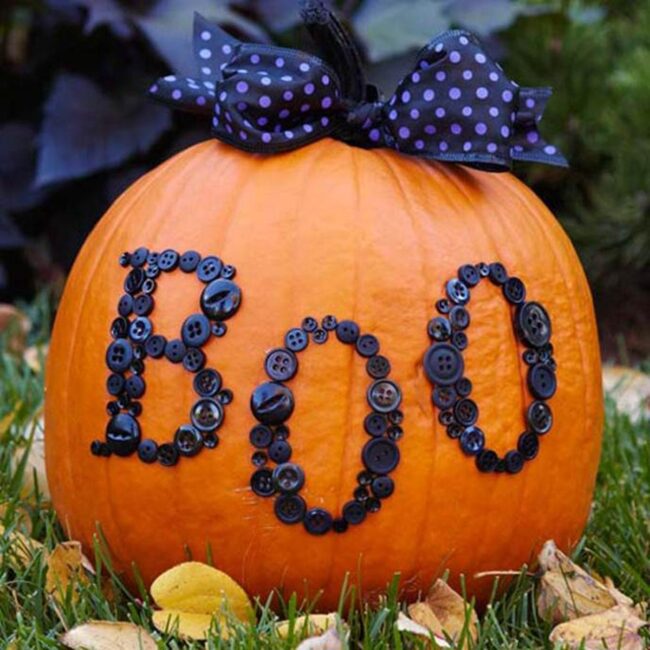
Buttons, Bows and BOO
A cute pumpkin shines with a buttons and bows design that captures the Halloween spirit. Start by finding a large pumpkin to showcase various sizes of black buttons while spelling out the word BOO.
Use either a letter stencil or print letters from an online pattern, then cut them out for tracing on your pumpkin with pencil lines. Once traced, fill in each letter using hot glue to secure the buttons firmly in place.
Paint the stem black and allow it time to dry completely. Finish this charming decoration by tying a black polka dot ribbon into a bow around the stem for added flair.
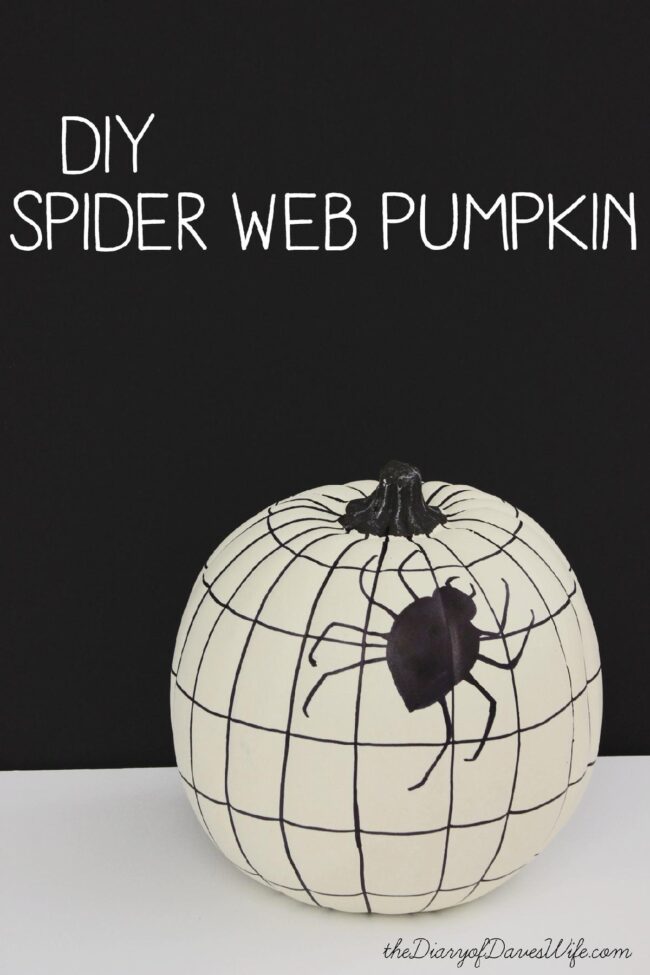
Criss Crossing the Web
A simple pumpkin can become a spooky decoration with just a few lines. Start by drawing vertical grooves on the surface, then add horizontal or circular lines to mimic a spider web.
This quick crafting task works well on white foam or hollow pumpkins too. For an extra fright, include a large spider in your design.
You can either draw it freehand or trace from a pattern you find online. Use flat black paint for an eerie look, or shiny paint to make it stand out even more during Halloween celebrations!
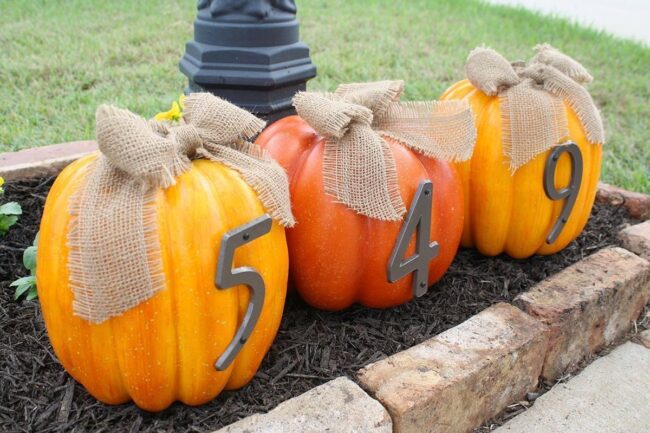
Address my Pumpkin
Creating a personalized address using pumpkins adds charm for both party guests and trick-or-treaters. This fun project works well for Halloween and Thanksgiving, making your home stand out.
Simple materials make this task easy: gather three large pumpkins, wooden or metal numbers, burlap for bows, and glue. Choose real pumpkins for stability during bad weather or use heavier faux ones if preferred.
Secure the house numbers onto the pumpkins with glue or screws that go through them, then tie burlap around their stems to finish off the look.
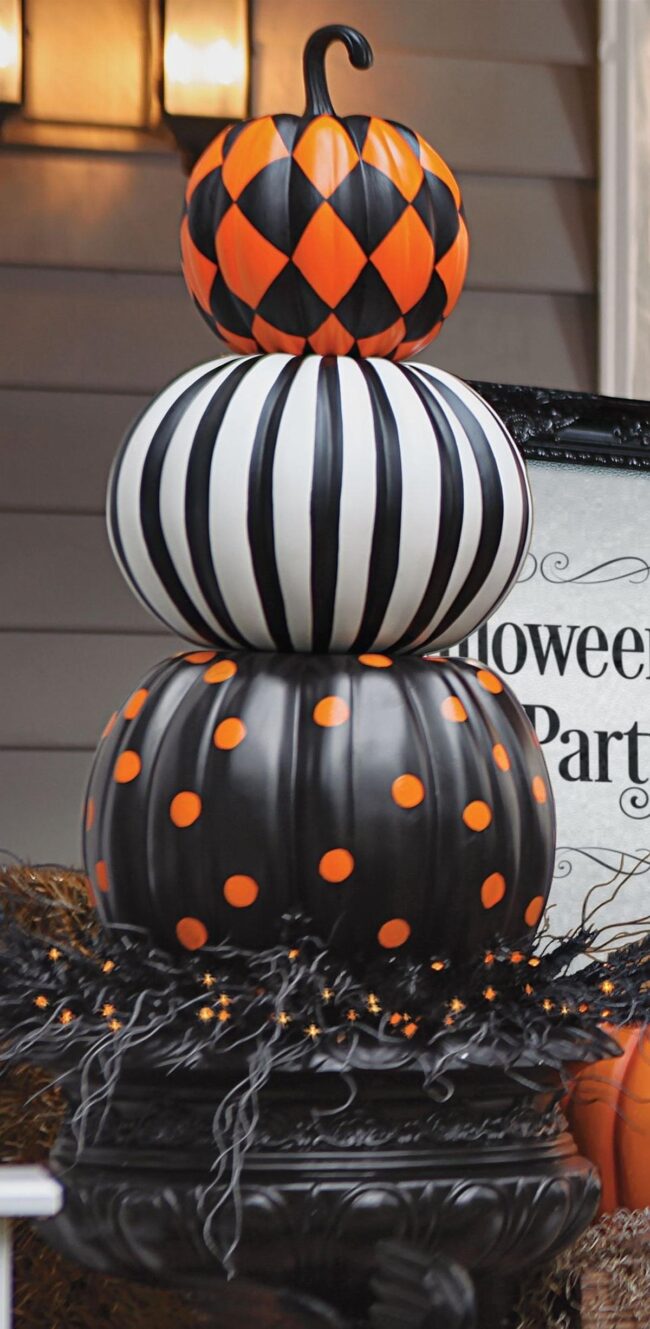
Harlequin, Stripes and Dots Stack
Stacking pumpkins adds height, depth, and charm to your Halloween decor. These colorful pumpkins fit well on a porch or in an entryway, making them eye-catching wherever you place them.
A sturdy resin planter holds them securely while giving a polished look. Made from weather-resistant materials like resin and fiberglass, these patterned pumpkins feature classic designs with stripes, harlequin patterns, and polka dots in festive colors.
Simple assembly makes it easy to set up this stylish display each year. You can also create a unique topiary using similar pumpkin styles and planters for even more flair in your decorations.
Pixie Dust My Pumpkin
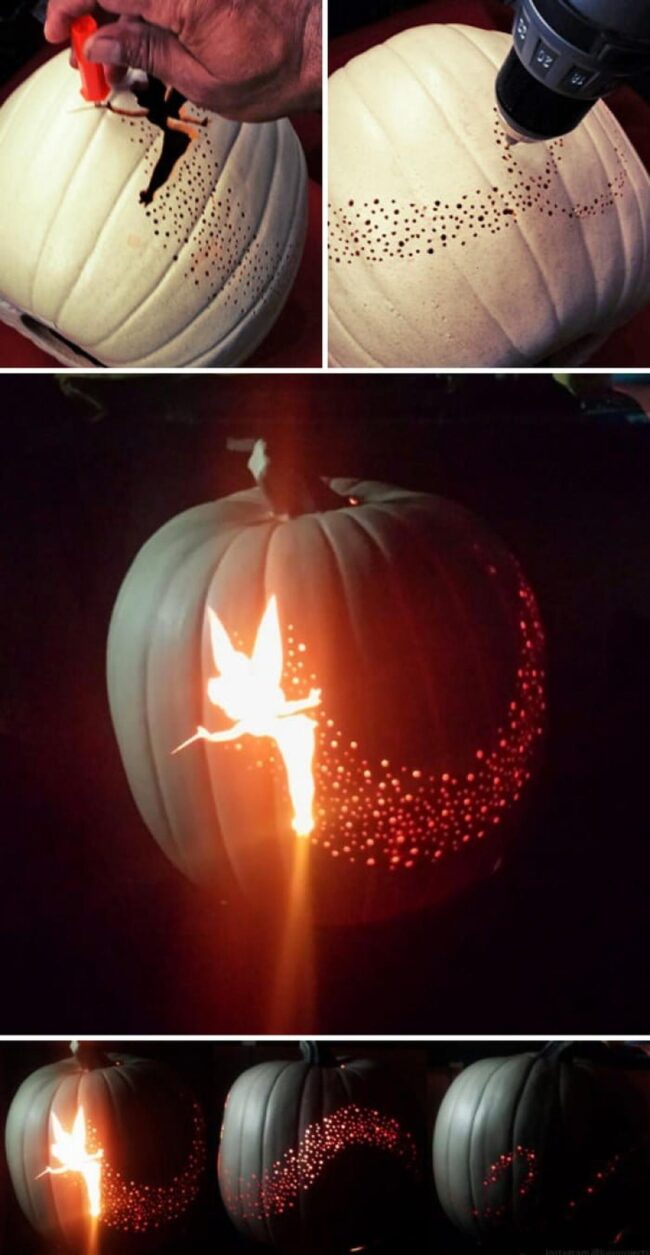
Tinker Bell’s magic shines bright in this fun pumpkin project. Kids and adults love seeing her silhouette transform an ordinary pumpkin into something special.
First, find a Tinker Bell image online and print it out. Use an artificial pumpkin for easy decoration; attach the printed image to the surface.
With a push pin, outline the design on your pumpkin until finished. Carve carefully along these lines using a hot knife or carving tool to reveal her shape clearly.
Place a small light bulb or battery-operated candle inside to illuminate Tinker Bell's enchanting presence!
Split Mummy
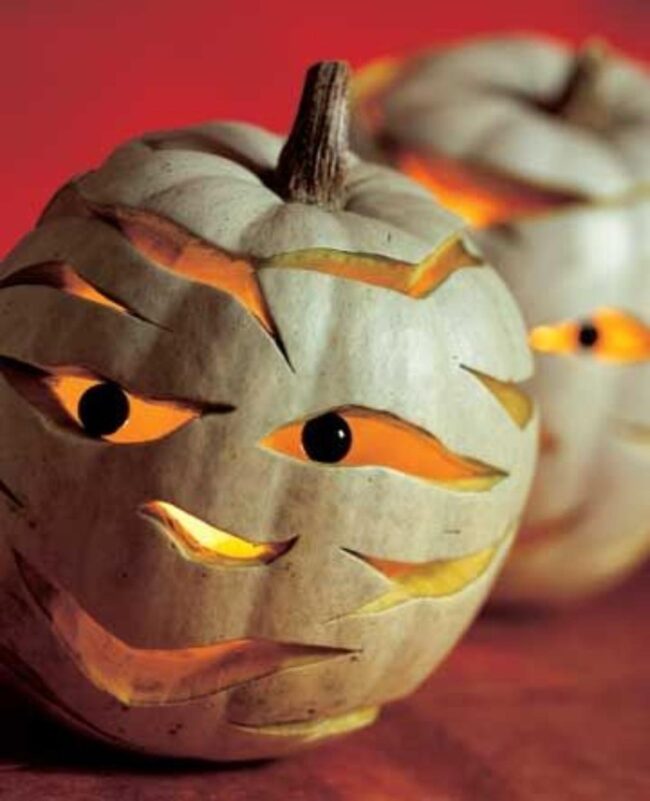
A mummy pumpkin adds a spooky touch to Halloween celebrations. Start by choosing a natural white pumpkin and cutting off the top.
Scoop out the insides and clean both the inside and lid thoroughly. Carving requires skill, so refer to pictures for guidance on where to make cuts, focusing on the eyes, nose, and mouth with vital slits around them.
Insert black marbles as eyes using flat toothpicks; glue them securely with glass adhesive and let it dry completely. For an even creepier look, place a candle inside to illuminate its frightening face at night.
Pumpkin Baubles
Decorating with painted pumpkins adds a fun touch to any celebration. These pieces fit perfectly for Halloween and other seasonal events.
They look great in baskets, on trays, or as centerpieces around your home or garden. Simple steps make it easy to create them using small pumpkins with long stems and various paint colors.
After painting the pumpkin up to the stem, let it dry completely. A layer of white tacky glue on the stem followed by a sprinkle of glitter brings extra sparkle; just brush off any loose glitter when it's dry for a clean finish.
Pumpkin Votive Glow
Small spaces like nightstands, niches, and sideboards shine brightly with votive candles. These candles create a warm glow that adds joy to any celebration, especially during winter holidays.
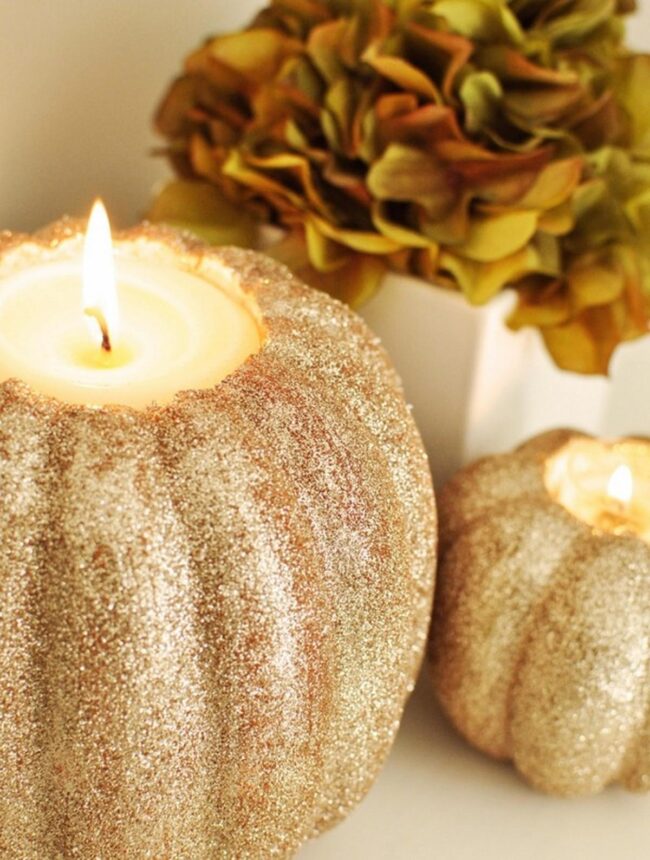
Halloween is another occasion where they can truly sparkle. Start this project with small styrofoam pumpkins and measure the size of your votive candle's opening.
Drill into the pumpkin to make a hole for the candle, then trim away extra foam as needed. After cutting out the center, cover the outside in craft glue before sprinkling on gold glitter generously; let it dry completely afterwards.
A quick spray of hairspray keeps all that glitter from falling off later!
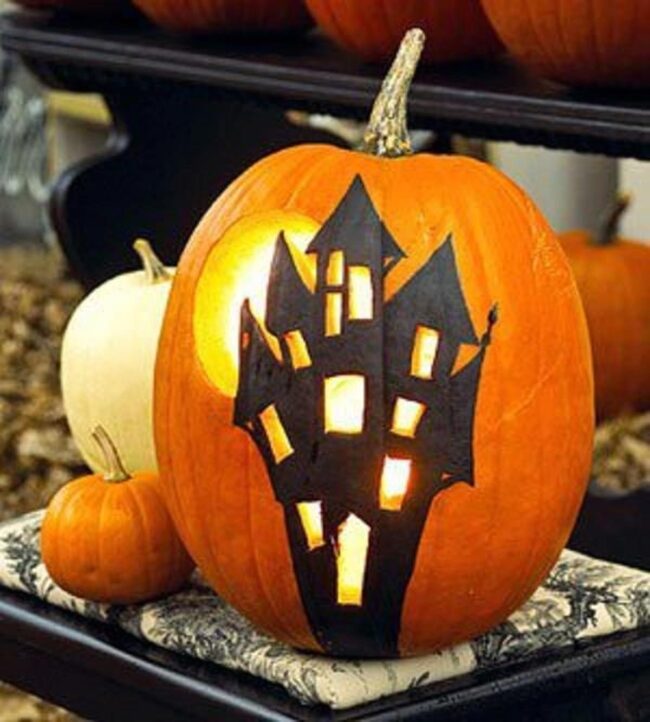
Illuminated Haunted House
The glow from a carved pumpkin adds life to any haunted house display. A simple stencil helps create the spooky scene on the front of your pumpkin.
Look for designs online or in craft books, then print and transfer one onto your pumpkin. Black paint enhances the haunting effect, while chisel-cut windows add detail.
Carve out a moon in the background for extra flair and light up open areas with battery-operated candles. This idea fits perfectly into a haunted house party theme alongside Halloween decorations and tableware.
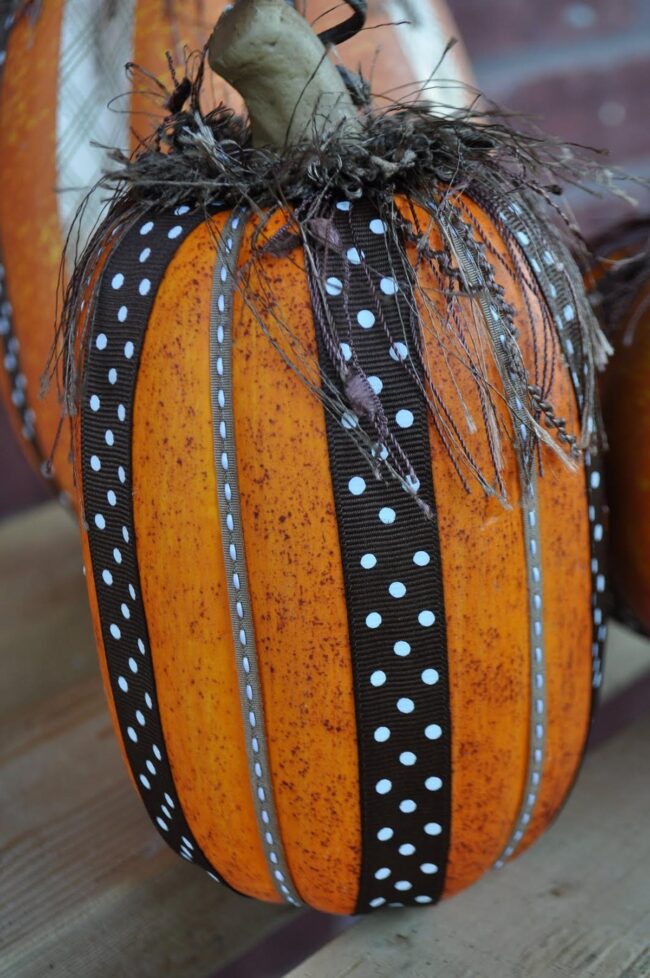
Ribbons and Speckles
Starting with a tall pumpkin adds elegance to your decoration. Use ribbons of various patterns and widths to highlight its length, making the design look fuller.
A striking feathered stem topper enhances the pumpkin’s charm and draws eyes upward. Painting the pumpkin stem in a contrasting ribbon color creates an eye-catching detail, while black paint spots on the body add depth.
Simply attach the ribbon from bottom to top using craft glue for stability. Finally, fill in with your chosen topper material for that perfect finish!
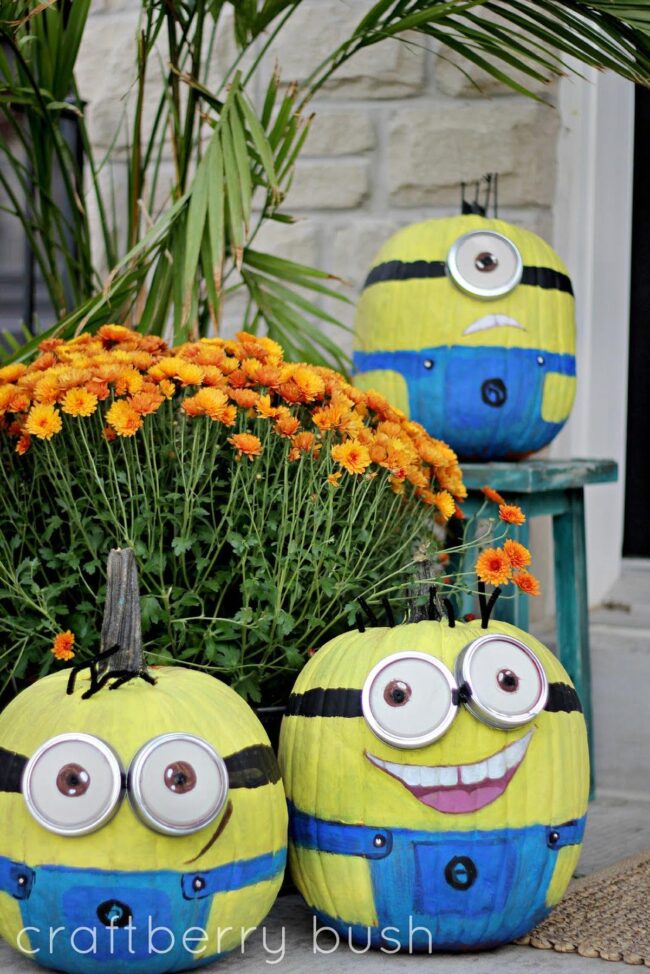
Halloween Minions Pumpkin Style
Kids can bring the fun of their favorite movie to life by creating minion pumpkins. These cute Halloween decorations work well for birthday parties and other celebrations, too.
Start with a few pumpkins and yellow paint; several coats may be needed, so allow each layer to dry before adding more. Eyes and costumes are easy to find online or in stores.
Use glue or tape to attach these features securely. For a playful touch, black pipe cleaners make great hair pieces—just drill small holes on top of each pumpkin and insert the pipe cleaners for that perfect look!
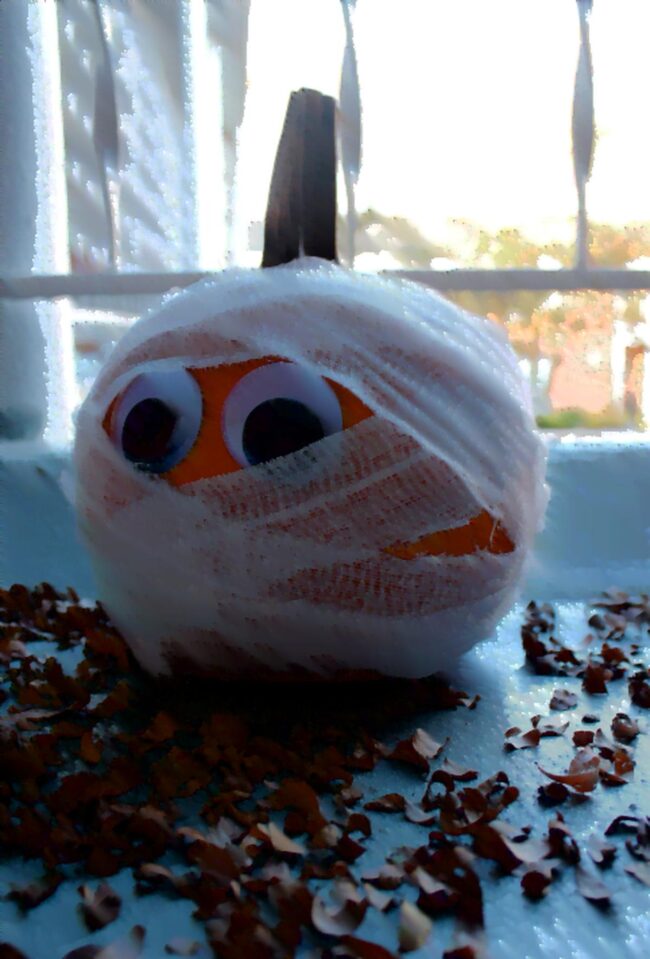
Wide-eyed and Mummified
Cute pumpkin mummies brighten up Halloween fun. They join a lively crew of famous monsters including Dracula, Frankenstein, and the Wolf Man.
This colorful group adds excitement to any pumpkin fest. Creating your own mummy pumpkin is simple and quick with just a few supplies.
White gauze bandaging wraps around the pumpkin, while glue holds everything in place along with some playful fake eyes for charm.
Snail in Pumpkin
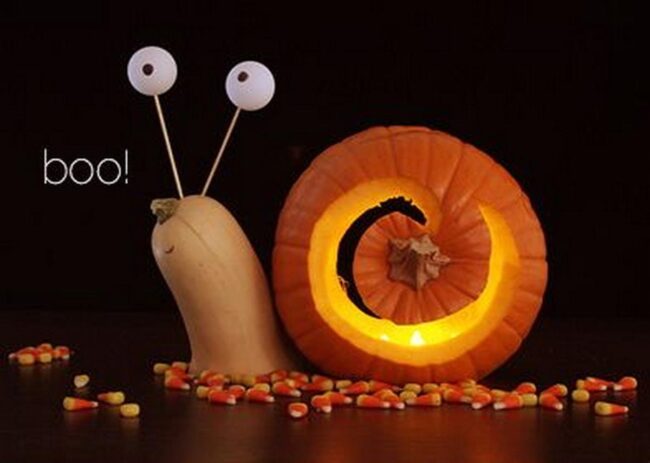
Start with a simple pumpkin carving; make spirals on top while cutting off part of the side for stability. The head can be made using the top of a butternut squash, which gives it character.
Wooden skewers hold ping-pong balls that serve as eyes; fill in these eyes and draw a mouth using a black marker. A tea candle inside the spiral lights up this unique creation beautifully, making it stand out even after Halloween ends.
Bats in Flight Pumpkin
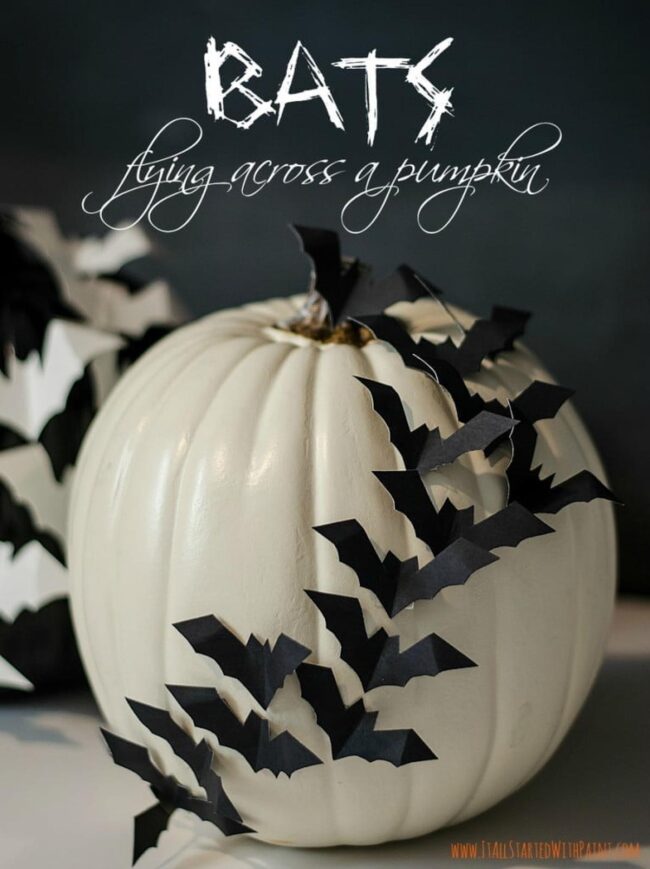
Bats add a special touch to white pumpkins, whether they are made of resin, ceramic, or natural materials. These cutouts bring both movement and texture to the display.
A spider web backdrop enhances their visibility alongside other pumpkins. Making bats is simple with black poster board and free patterns available online.
Tracing the pattern on a fold saves cutting time while giving each bat a finished look that stands out nicely. This bold yet calm arrangement serves as an eye-catching centerpiece for your Halloween party table.
Silver, Gold, and Black Stack Scare
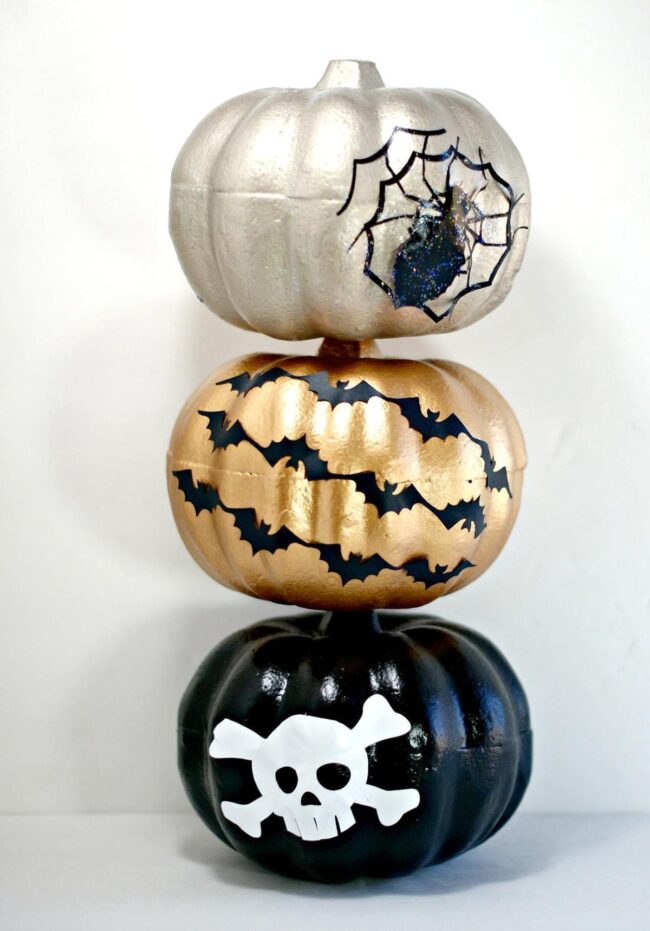
Creating a spooky atmosphere becomes simple with this metallic pumpkin stack. The blend of silver, gold, and black gives it an eye-catching look.
Halloween creatures like skulls, bats, and spiders add fun details that enhance the pumpkin’s shine. Using foam pumpkins makes the project easy to tackle.
Spray two coats of paint on each one for a solid finish. Connecting the pumpkins is straightforward with a narrow dowel or skewer; just make sure everything stays in place by using Mod Podge if needed for vinyl cutouts.

